Master Homemade Heath Bar Ice Cream: The Ultimate Guide to Toffee Prep Secrets
There's something uniquely satisfying about a scoop of perfectly crafted heath bar ice cream. It’s a symphony of textures and flavors: the velvety smooth, rich caramel ice cream base dancing with delightful crunch of buttery, chocolate-covered toffee bits. While store-bought versions offer convenience, the unparalleled indulgence of homemade Heath Bar ice cream is a culinary experience every dessert enthusiast deserves to savor. This article will guide you through the process, focusing on the often-overlooked yet critical "toffee prep secrets" that elevate a good batch to an unforgettable one, ensuring every bite is a reminder of pure dessert bliss.The Irresistible Allure of Homemade Heath Bar Ice Cream
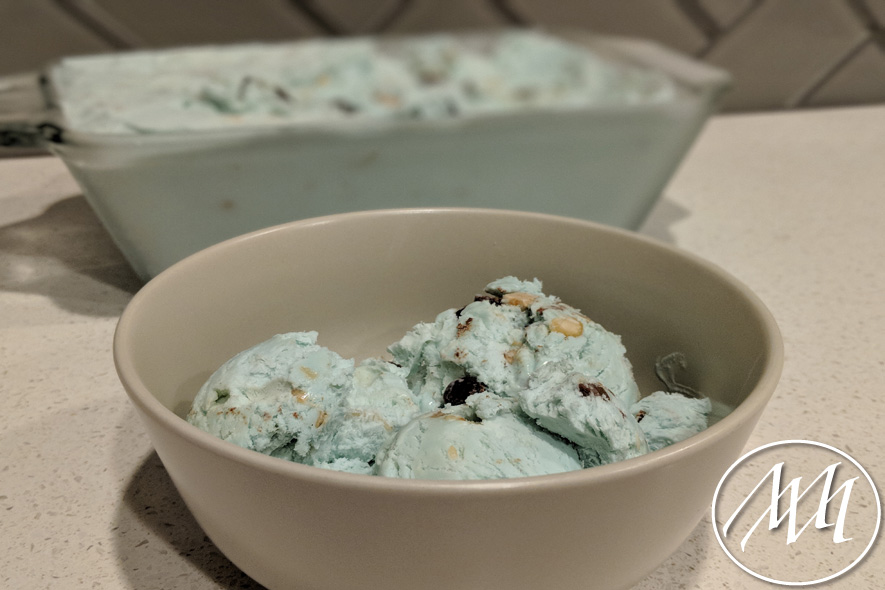
What makes heath bar ice cream such a beloved classic? It’s more than just a combination of sweet and creamy; it’s an adventure for the palate. The base, often a rich caramel or vanilla custard, provides a luxurious mouthfeel that perfectly complements the star of the show: the Heath bar pieces. These aren't just any candy bits; they are a marvel of crunchy, brittle toffee enrobed in a thin layer of milk chocolate. This dual texture—creamy base against crisp, yet slightly chewy toffee—creates an addictive contrast that keeps you coming back for more. Making it at home allows for complete control over the quality of ingredients, the richness of the base, and perhaps most importantly, the quantity and texture of the Heath bar inclusions. No skimping on the good stuff here! You can customize the sweetness, the vanilla notes, and even the type of dairy for a truly personalized treat. Furthermore, there's an inherent charm and accomplishment in serving a dessert you've meticulously prepared, especially one as universally adored as this one. It transforms a simple dessert into a memorable occasion, a perfect summer treat or a comforting indulgence any time of year.Toffee Prep Secrets: Unlocking the Perfect Heath Bar Crunch
The success of your homemade heath bar ice cream hinges significantly on how you prepare the Heath bars themselves. Getting the right consistency – not too powdery, not too large – is key to an enjoyable eating experience. The references suggest two main approaches, each with its own advantages, and understanding these nuances is your first secret weapon.Method 1: Slicing for Defined Chunks (Room Temperature)
If you prefer distinct, more substantial pieces of chocolate-covered toffee in your ice cream, slicing is the way to go. For easier cutting, ensure your Heath bars are at room temperature.How to do it:
- Unwrap the Heath bars and let them sit at room temperature for 15-30 minutes.
- Using a sharp, heavy knife (like a chef's knife), slice the bars into your desired chunk size. You can go for small squares, oblong pieces, or even rough triangles.
- Tip: For a cleaner cut, you might gently warm your knife under hot water and dry it before each slice, especially if the chocolate coating is stubborn.
When to choose this method: This is ideal if you want to experience larger bursts of the buttery toffee and chocolate in each spoonful. The more defined pieces hold their shape better and offer a satisfying bite.
Method 2: Crushing and Crumbling for Integrated Texture (Frozen)
For those who prefer a more even distribution of toffee throughout the ice cream, resulting in a textural 'crumble' rather than distinct chunks, freezing the bars first is highly recommended.How to do it:
- Unwrap the Heath bars and place them in the freezer for at least 30 minutes, or even longer (up to an hour) for best results. This makes the brittle toffee much more susceptible to breaking cleanly.
- Once frozen, you have a few options for crushing:
- Ziploc Bag & Mallet/Rolling Pin: Place the frozen bars in a sturdy freezer bag, seal it, and use a meat mallet, rolling pin, or even the bottom of a heavy pan to break them into pieces. Control the force to achieve your desired crumb size – from coarse chunks to finer crumbles.
- Food Processor: For quick and uniform results, a food processor can be used. Pulse the frozen bars a few times until they reach your preferred consistency. Be careful not to over-process, or you might end up with a powdery mush rather than distinct pieces.
When to choose this method: This method is fantastic for ensuring every scoop has a consistent toffee presence. The smaller, sharper edges of the crushed toffee also contribute to a delightful "crunch" that is distinct from the chewy bite of larger pieces.
Pro-Tip: Regardless of the method, once your Heath bars are prepared, keep them chilled until just before mixing into the ice cream. This prevents the chocolate from melting too quickly and clumping together when introduced to the cold ice cream base. For an extra layer of flavor and to protect against ice crystal formation, you can lightly toss the crushed toffee with a tablespoon of cocoa powder or cornstarch before adding to the churned ice cream.
Crafting Your Creamy Dream: The Homemade Heath Bar Ice Cream Base
- 3 cups milk
- 1 1/2 cups sugar
- 1/4 teaspoon salt
- 6 cups half-and-half
- 6 tablespoons vanilla extract
- 6 Heath candy bars, crushed (or prepared as above)
This simple combination, though straightforward, allows for a remarkably rich and flavorful base, especially when combined with the right preparation techniques. The beauty of homemade ice cream lies in its simplicity and the quality of ingredients you choose.
- Combine & Dissolve: In a large bowl, whisk together the milk, sugar, and salt until the sugar is completely dissolved. This step is crucial for ensuring a smooth, non-gritty texture.
- Add Dairy & Flavor: Stir in the half-and-half and the generous amount of vanilla extract. The half-and-half contributes to the creamy consistency without being overly heavy, while the vanilla provides a warm, aromatic backdrop that beautifully complements the toffee.
- Chill Thoroughly: This is arguably one of the most important steps. Pour the mixture into an airtight container and refrigerate it for at least 4 hours, or preferably overnight. A well-chilled base churns faster, results in a smoother texture, and minimizes ice crystal formation.
Insight into Ingredients: While half-and-half provides a good balance, some enthusiasts prefer a richer base using heavy cream or a combination of heavy cream and whole milk. Experimenting with these ratios can yield varying levels of richness and mouthfeel. Always opt for high-quality vanilla extract – the flavor truly shines through in homemade desserts. For a deeper dive into crafting your churn, check out our guide on a Simple Heath Bar Ice Cream Recipe for Your Electric Freezer.
Assembly and Freezing: Bringing It All Together
Once your base is thoroughly chilled, it's time for the magic to happen in your ice cream maker.- Churn the Base: Pour the chilled mixture into your 4-quart electric ice cream freezer (or whichever type you own). Process it according to your machine's instructions until it reaches the consistency of soft-serve ice cream. This usually takes 20-30 minutes, depending on the machine and the initial temperature of your base.
- Integrate the Toffee: During the last 5 minutes of churning, or immediately after the base has reached soft-serve consistency, add your prepared Heath bar pieces. This timing is critical; adding them too early can over-pulverize the toffee, while adding them too late might result in uneven distribution. You want the pieces to be well dispersed but still retain their crunch and integrity.
- Final Freeze (Ripening): Transfer the freshly churned ice cream into a freezer-safe container. For optimal texture and firmness, cover it tightly and freeze for an additional 2-4 hours, or until it reaches your desired scoopable consistency. This "ripening" period allows the ice cream to firm up properly and develops its full flavor.
Storage Secrets: To prevent ice crystals from forming on the surface and to keep your ice cream fresh, press a piece of parchment paper or plastic wrap directly onto the surface of the ice cream before sealing the container. Store in the coldest part of your freezer. For more tips on achieving that perfect scoop, explore our article on Indulgent Homemade Heath Bar Ice Cream: A Summer Treat.
Beyond the Basic: Elevating Your Heath Bar Ice Cream
While the classic heath bar ice cream is undeniably delicious, there's always room for personalization:
- Homemade Toffee: For the ultimate scratch-made experience, consider making your own buttery toffee from scratch. It's a rewarding process and allows for customization of the thickness and chocolate coating.
- Caramel Swirl: Introduce a homemade or high-quality store-bought caramel sauce, swirling it into the ice cream during the last few minutes of churning or layering it into the container before the final freeze.
- Nutty Addition: A handful of toasted pecans or almonds can add another layer of crunch and flavor that complements the toffee beautifully.
- Chocolate Drizzle: A warm chocolate fudge drizzle or a sprinkle of extra mini chocolate chips can heighten the chocolate element.
- Serving Suggestions: Serve your masterpiece in a waffle cone, alongside a warm brownie, or even as a decadent topping for apple crisp.
